How to install a holding tank vent filter in 15 minutes (step-by-step with photos)
, by Joseph Koreis, 6 min reading time
, by Joseph Koreis, 6 min reading time
Learn how to efficiently install a holding tank vent filter in just 15 minutes. This professional guide provides clear steps for optimal results without hassle.

By Joe Koreis, Nautilus Filter™
Installing a holding tank vent filter is a straightforward process that can significantly improve the odor control in your marine or RV setup. This guide will walk you through the installation steps, ensuring you can complete the task in just 15 minutes. By following these instructions, you will learn how to effectively install a holding tank vent filter, which is essential for maintaining a pleasant environment in your vehicle. Many users face challenges with unpleasant odors emanating from their holding tanks, but with the right tools and techniques, you can easily mitigate this issue. This article will cover the necessary tools, installation steps, and tips for optimal performance, ensuring your holding tank vent filter operates effectively.
Installing a holding tank vent filter involves several key steps that ensure proper functionality and odor control. This section will provide a detailed overview of the installation process, including the estimated time and tools required.
The installation of a holding tank vent filter can be completed in approximately 15 minutes. This quick timeframe makes it an accessible task for most users, allowing for immediate improvements in odor control without significant downtime.
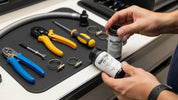
To successfully install a holding tank vent filter, you will need the following tools and materials:
Having these tools ready will streamline the installation process and help you achieve the best results.

The installation of a holding tank vent filter can be broken down into several clear steps. Following these steps will ensure that the filter is installed correctly and functions effectively.
The first step is to identify the holding tank vent line. This hose is typically located near the holding tank and is responsible for allowing gases to escape. Understanding its function is crucial for effective installation.
Select an optimal location for the filter installation. It is important to position the filter for easy access and to mount it above the tank level to prevent any fluid buildup. This placement will enhance the filter's performance and longevity.
Using the hose cutter, carefully cut the vent hose at the chosen installation point. Ensure that the cut is clean and straight to facilitate a proper fit for the filter.
Once the hose is cut, attach the Nautilus Filter™ to the vent hose. Make sure it fits snugly to prevent any leaks. The filter should be oriented correctly to allow for optimal airflow.
Secure the filter in place using the provided hose clamps. Tighten the clamps with a screwdriver to ensure that the filter is firmly attached and will not come loose during operation.

After installation, perform a final check to ensure that all connections are secure and that the filter is properly mounted. This step is crucial for preventing any potential issues in the future.
To ensure that your holding tank vent filter operates at its best, consider the following tips:
Before starting the installation, gather the necessary tools and materials. This preparation will help you complete the task efficiently and effectively.
Preparing the vent hose involves cleaning the area around the hose and ensuring that it is free from debris. This step is essential for a successful installation and will help maintain the integrity of the filter.
The step-by-step instructions provided earlier outline the entire process for installing the Nautilus Filter™. Following these steps will ensure that you achieve a successful installation.
When replacing an old filter, ensure that you follow these steps:
To attach the Nautilus Filter™, follow the installation steps outlined earlier, ensuring that the filter is securely fastened to prevent any leaks.
After installation, test the system by checking for any odors or leaks. A properly installed filter should significantly reduce unpleasant smells.
Signs of correct operation include:
If you encounter issues during installation, consider the following troubleshooting tips:
To maintain your holding tank vent filter, consider the following tips:
It is recommended to replace or refill your holding tank vent filter every 3-6 months, depending on usage and environmental conditions.
Using Nautilus Filter™ refill kits provides several advantages:


